Welcome to Lappe's Bee Supply's blogs section. We are a trusted beekeeping company in the USA. We give relevant insights, seasonal guidance, and professional advice for beekeepers of all experience levels. From hive management and bee wellness to honey production and equipment guides, we have it all that you will require to thrive. Get updated, motivated, and connected with the beekeeping community through regular news from Lappe's Bee Supply.
Installing Honey Bee Nucs
The Buzz About This Post
- Key Takeaways
- Table of Contents
- What Is a Honey Bee Nuc?
- Why Do Beekeepers Start With a Nuc?
- How Should You Prepare the Hive Before Pickup?
- What Equipment Do You Need to Install a Nuc?
- How Should You Transport a Honey Bee Nuc Safely?
- When Should You Install the Nuc?
- How Do You Transfer Nuc Frames Into the Hive?
- How Do You Move Remaining Bees Into the Hive?
- What Should You Feed a Newly Installed Nuc?
- How Should You Care for the Colony After Installation?
- What Mistakes Should New Beekeepers Avoid?
- What Is the Bottom Line for Installing a Honey Bee Nuc?
- Frequently Asked Questions
- Sources and Further Reading
- FAQs
How to Install a Honey Bee Nuc Into a Hive
Installing a honey bee nuc is one of the most important first steps in beekeeping. A careful installation protects the queen, keeps brood organized, reduces colony stress, and gives the bees the food, space, and structure they need to begin growing in their permanent hive.
Key Takeaways
- A honey bee nuc is a small established colony with a queen, workers, brood, comb, and food stores.
- A prepared hive should be ready before the nuc arrives so the colony can be installed quickly.
- Keeping nuc frames in their original order helps preserve brood nest organization.
- Ventilation during transport helps prevent overheating and unnecessary stress.
- A single brood box is usually the best starting space for a newly installed nuc.
- Sugar syrup can support comb building and brood rearing while the colony establishes.
- Follow-up care should focus on food supply, queen activity, brood pattern, comb growth, and colony space.
What Is a Honey Bee Nuc?
- “Nuc” is short for nucleus colony.
- Most nucs are sold on four or five frames.
- A nuc already includes an accepted queen.
- Brood, comb, and food stores are already present.
- Nucs usually build momentum faster than package bees.
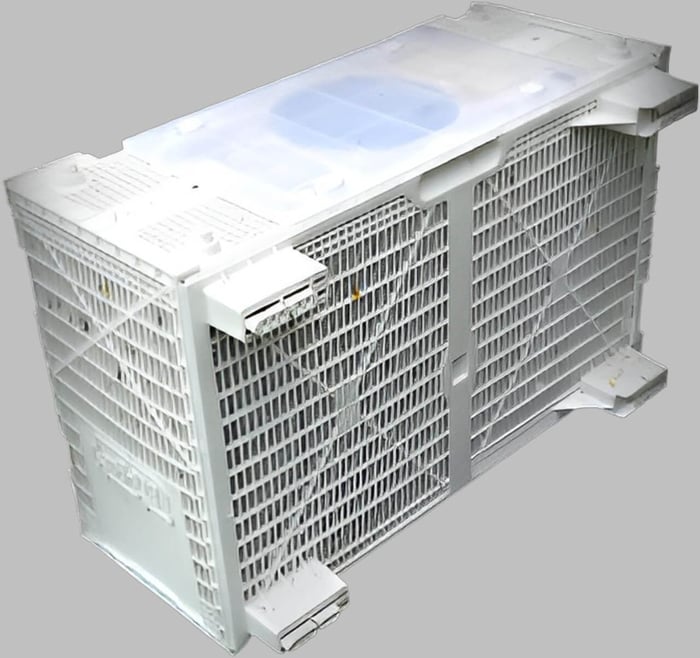
A honey bee nuc is not just a container of loose bees. It is a small working colony with its own structure. A typical nuc includes adult worker bees, a laying queen, developing brood, drawn comb, pollen, and stored nectar or honey. Because the bees already know their queen and are already caring for brood, the colony can begin expanding soon after installation. This is one reason many new beekeepers prefer starting with nucs instead of packages.
Why Do Beekeepers Start With a Nuc?
- Drawn comb lets bees use the hive immediately.
- Existing brood supports population growth.
- The queen is already accepted by the workers.
- The colony is easier for beginners to evaluate.
A nuc gives a new beekeeper a practical head start. Drawn comb is valuable because bees do not have to build every cell before the queen can lay or food can be stored. Existing brood means the colony already has young bees developing. A nuc still requires careful management, but it usually begins with more structure and stability than a newly assembled colony.
How Should You Prepare the Hive Before Pickup?
- Set the hive in its permanent apiary location.
- Install the bottom board and entrance reducer if needed.
- Use one brood box with frames ready.
- Have the inner cover and outer lid nearby.
- Prepare sugar syrup before bringing bees home.
The hive should be ready before the nuc arrives. A complete setup includes a stable hive stand, bottom board, brood box, frames, inner cover, outer cover, and feeder. Most beginners should start with one brood box because a smaller space is easier for bees to heat, defend, and organize. Giving a small colony too much open space too early can make temperature regulation and pest defense more difficult.
Before pickup, prepare sugar syrup and choose a feeder style that works with your equipment. Frame feeders, top feeders, and entrance feeders are commonly used. The best choice depends on weather, hive style, and personal management preference.
What Equipment Do You Need to Install a Nuc?
- A veil protects the face and eyes.
- Gloves can help new beekeepers feel more confident.
- A smoker helps calm bees during frame transfer.
- A hive tool separates frames and loosens propolis.
- Extra frames fill the brood box after transfer.
| Equipment | Purpose | Beginner Tip |
|---|---|---|
| Bee veil or suit | Protects the beekeeper during live bee handling. | New beekeepers usually work more calmly when protected. |
| Hive tool | Separates frames and lifts stuck components. | Use slow movements to avoid rolling bees. |
| Smoker | Helps reduce defensive behavior during inspection. | Use cool, light smoke rather than heavy smoke. |
| Feeder | Provides supplemental syrup while the colony establishes. | Check feed levels regularly after installation. |
| Extra frames | Fill the remaining space in the brood box. | Keep frame spacing tight and even. |
How Should You Transport a Honey Bee Nuc Safely?
- Keep the nuc upright during travel.
- Secure the nuc so it cannot slide or tip.
- Keep ventilation openings clear.
- Avoid leaving bees in a hot parked vehicle.
- Drive directly to the apiary when possible.
Transportation can be stressful for bees because they are confined with brood and comb. Place the nuc on a flat surface and secure it so it cannot tip over. Ventilation is especially important. Bees produce heat inside the box, and blocked vents can create dangerous conditions. Avoid stacking items against the nuc, and keep the box out of direct sun whenever possible.
When Should You Install the Nuc?
- Same-day installation is usually best.
- Short acclimation can help bees orient to the new location.
- If holding briefly, open the entrance for airflow.
- Keep the nuc near the hive location.
In most cases, it is best to install the nuc soon after arriving at the apiary. If you need a short pause, place the nuc beside the prepared hive with the entrance facing the same direction as the hive entrance. Open the entrance so bees can ventilate and begin orienting. Do not leave a closed nuc in heat or direct sunlight.
How Do You Transfer Nuc Frames Into the Hive?
- Use light smoke before opening the nuc.
- Remove frames one at a time.
- Preserve the original frame order.
- Keep brood frames together in the center.
- Watch for the queen during transfer.
- Avoid leaving brood exposed too long.
Step-by-Step Nuc Installation Checklist
- Put on protective gear and light your smoker.
- Open the receiving hive and make space for the nuc frames.
- Lightly smoke the nuc entrance and wait briefly.
- Open the nuc slowly using your hive tool.
- Remove the first outside frame carefully.
- Transfer each frame into the hive in the same order.
- Keep brood frames together in the center of the brood box.
- Add empty or foundation frames on the outside edges.
- Push frames together evenly to maintain proper spacing.
- Install the feeder, inner cover, and outer cover.
The frame transfer is the heart of the installation. Bees arrange brood, pollen, nectar, and honey in a useful pattern. Keeping the frames in the same order helps preserve that organization. Work slowly and keep frames over the hive body when possible. This reduces the risk of losing the queen if she falls. If the weather is cool, move efficiently so brood is not exposed longer than necessary.
How Do You Move Remaining Bees Into the Hive?
- Inspect the nuc walls and bottom.
- Look for the queen before shaking bees.
- Tap or shake bees gently over the hive.
- Remove the empty nuc box after installation.
Bees often remain inside the nuc box after the frames are moved. Before tapping or shaking them into the hive, check carefully for the queen. If she is in the box, avoid rough handling and give her a clear path into the hive. Once most bees are inside, remove the empty nuc box from the area so bees do not keep returning to it.
What Should You Feed a Newly Installed Nuc?
- Sugar syrup provides accessible carbohydrates.
- Pollen patties may help when natural pollen is scarce.
- Feeders should be checked regularly.
- Feeding should match weather, forage, and colony needs.
A newly installed nuc needs energy to build comb, support brood, and grow. Sugar syrup can help during poor weather or limited nectar flow. Some beekeepers also use pollen patties when natural pollen is scarce, but patties should be monitored closely and replaced as needed. Feeding is not a substitute for good colony management, but it can help a small colony establish more confidently.
How Should You Care for the Colony After Installation?
- Check that syrup remains available if feeding.
- Look for eggs, larvae, or capped brood during inspections.
- Watch whether bees are drawing new comb.
- Observe entrance traffic and pollen collection.
- Add space only when the colony is ready to use it.
The first few weeks after installation should be calm and purposeful. A follow-up inspection should answer clear questions: Is the queen likely present? Are bees covering brood? Is the feeder accessible? Are the bees drawing comb? Is the colony running out of room? Avoid opening the hive too often just to look. Each inspection should have a reason.
| What to Check | Good Sign | Possible Concern |
|---|---|---|
| Feed | Bees are using syrup steadily. | Feeder is empty, leaking, or inaccessible. |
| Queen status | Eggs, larvae, or capped brood are visible. | No signs of laying after the colony settles. |
| Comb growth | Bees are drawing comb evenly. | Comb is crooked because frame spacing is uneven. |
| Population | Bees cover the brood frames well. | Brood is exposed or the colony appears unusually weak. |
What Mistakes Should New Beekeepers Avoid?
- Do not block ventilation during transport.
- Do not randomly rearrange nuc frames.
- Do not leave brood exposed longer than necessary.
- Do not leave wide gaps between frames.
- Do not assume the colony has enough food without checking.
Most nuc installation problems come from stress, disorganization, or lack of follow-up care. Bees are resilient, but beginners can make the transition harder by leaving the nuc in a hot vehicle, spreading brood frames apart, crushing bees during transfer, or forgetting to feed when natural forage is limited. A good installation is steady, simple, and organized.
What Is the Bottom Line for Installing a Honey Bee Nuc?
Installing a honey bee nuc does not need to be intimidating. Prepare the hive first, transport the colony carefully, transfer frames in their original order, feed when needed, and inspect with purpose. With patient handling and good follow-up care, a nuc can become the foundation of a strong first-year colony.
Frequently Asked Questions
What is a honey bee nuc?
A honey bee nuc is a small established colony with a queen, worker bees, brood, drawn comb, and food stores.
How many frames are in a typical nuc?
Most nucs contain four or five frames, though exact frame counts can vary by supplier and equipment size.
Should I feed a newly installed nuc?
Yes. Sugar syrup is commonly used to support a newly installed nuc while it establishes, draws comb, and builds population.
Do I need to find the queen during installation?
No. You do not have to find the queen, but you should handle every frame carefully because she can be anywhere in the nuc.
Should nuc frames stay in the same order?
Yes. Keeping frames in the same order helps preserve the colony’s brood nest structure and resource arrangement.
Can I leave a nuc in the box overnight?
Short holding may be possible with ventilation and an open entrance, but same-day installation is usually preferred when conditions allow.
Why start a nuc in one brood box?
One brood box gives the colony a smaller space to warm, defend, and organize during early growth.
When should I inspect after installing a nuc?
Many beekeepers perform a follow-up inspection within about one week, depending on weather, colony condition, and local management needs.
When should I add another brood box?
Add another brood box when the colony is strong enough and using most of the available frame space, not simply because a calendar date arrives.
Sources and Further Reading
- Penn State Extension: Beekeeping Resources
- Penn State Extension: Beekeeping - Honey Bees
- Penn State Extension: Honey Bee Queen Introduction and Nucleus Colony Preparation
- USDA Agricultural Research Service: Honey Bee Hive Ventilation and Colony Conditions
- USDA Agricultural Research Service: Effects of Long-Distance Transportation on Honey Bees
- Bee Health Extension: Starting a Colony
- University of Minnesota Extension: Managed and Native Pollinators
- University of Georgia Extension: Bees and Pollinators
FAQs
What is a honey bee nuc?
A honey bee nuc is a small established colony with a queen, worker bees, brood, drawn comb, and food stores.
How many frames are in a typical nuc?
Most nucs contain four or five frames, though exact frame counts can vary by supplier and equipment size.
Should I feed a newly installed nuc?
Yes. Sugar syrup is commonly used to support a newly installed nuc while it establishes, draws comb, and builds population.
Do I need to find the queen during installation?
No. You do not have to find the queen, but you should handle every frame carefully because she can be anywhere in the nuc.
Should nuc frames stay in the same order?
Yes. Keeping frames in the same order helps preserve the colony’s brood nest structure and resource arrangement.
Can I leave a nuc in the box overnight?
Short holding may be possible with ventilation and an open entrance, but same-day installation is usually preferred when conditions allow.
Why start a nuc in one brood box?
One brood box gives the colony a smaller space to warm, defend, and organize during early growth.
When should I inspect after installing a nuc?
Many beekeepers perform a follow-up inspection within about one week, depending on weather, colony condition, and local management needs.
When should I add another brood box?
Add another brood box when the colony is strong enough and using most of the available frame space, not simply because a calendar date arrives.