Welcome to Lappe's Bee Supply's blogs section. We are a trusted beekeeping company in the USA. We give relevant insights, seasonal guidance, and professional advice for beekeepers of all experience levels. From hive management and bee wellness to honey production and equipment guides, we have it all that you will require to thrive. Get updated, motivated, and connected with the beekeeping community through regular news from Lappe's Bee Supply.
Installing and Supporting New Honeybee Colonies
The Buzz About This Post
Venturing into beekeeping is not just about cultivating an enjoyable hobby; it's about contributing to our ecosystem, promoting biodiversity, and enjoying the sweet rewards of your efforts. If you've decided to break into this fascinating world by installing new honeybee colonies, you’re taking a significant and rewarding step. This comprehensive guide will meticulously walk you through every aspect of the installation process and the ongoing support needed to ensure your colonies thrive.
Understanding the Dynamics of Honeybee Colonies
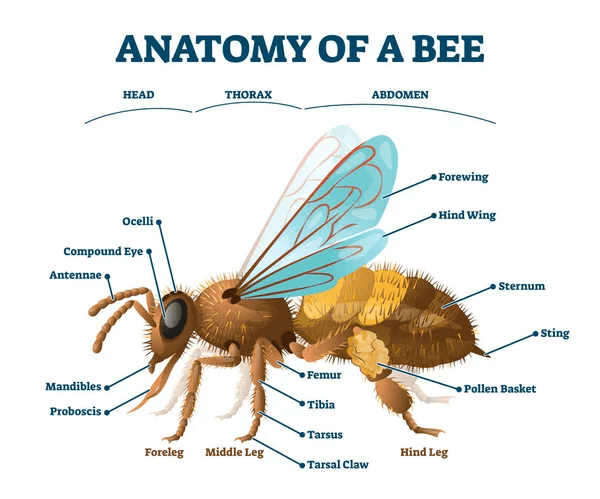
To successfully install and manage honeybee colonies, a foundational understanding of how these colonies operate is essential. Each colony is a highly organized entity composed of three primary castes of bees:
1. **The Queen**: The queen bee is the heart of the Honeybee colonies, responsible for reproduction and maintaining the social structure of the hive. A healthy queen can lay up to 2000 eggs per day during peak season. It’s crucial that she is well-mated and free of disease, as her performance directly affects colony health.
2. **Worker Bees**: The worker bees are sterile females that take on various roles throughout their lifespan, including foraging for nectar and pollen, cleaning the hive, caring for the brood, and defending the colony. Their adaptability is impressive, as they switch roles based on the colony's needs.
3. **Drones**: Drones are the male bees whose primary function during their short life is to mate with a queen. They do not contribute to foraging or hive maintenance and are typically expelled from the hive before winter or during food shortages.
Each bee has a specific role, and their successful interaction is what makes the colony thrive. Knowing this social structure will help you appreciate the importance of maintaining a happy and healthy hive.
Preparing for the Installation
1. **Choosing the Right Time**: Timing is everything when it comes to installing the Honeybee colonies. Early spring or late summer are ideal times, as the weather is mild, and bees can forage for food without stress. Try to avoid extremely hot days or cold spells, as extreme weather can disrupt the installation process and may lead to increased stress on the bees.
2. **Site Selection**: The location of your hive can significantly impact its success. Choose a spot with morning sun to warm the hive and encourage early foraging. Avoid areas with standing water or heavy foot traffic, which can disturb the bees. A level, slightly elevated position helps prevent moisture from accumulating and protects against flooding.
3. **Gathering Supplies**: Before installation, ensure you have all necessary supplies ready:
- **Beehive**: Most beginners opt for a Langstroth hive, known for its modular frames but other designs exist, like Top Bar and Warre hives.
- **Protective Gear**: Invest in a good quality bee suit, gloves, and a veil. This gear is critical for your protection, especially during installation.
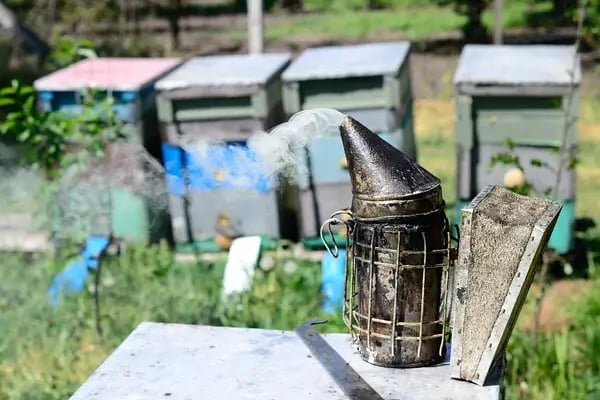
- **Tools**: Essential tools include a hive tool for scraping wax and propolis, a smoker to calm the bees, and a bee brush to gently encourage bees off frames.
- **Feeding Supplies**: Be prepared to provide sugar syrup or pollen patties, especially if natural forage is scarce.
4. **Understanding Local Regulations**: Before installing your hive, familiarize yourself with local regulations concerning beekeeping. Local councils or agricultural departments may have specific guidelines, zoning laws, or registration requirements for keeping bees.
The Installation Process
**Step 1: Unboxing the Bees**
When your package of bees arrives, it’s crucial to handle the box gently. Prior to opening it, give the box a light puff of smoke to calm the bees. This reduces agitation and helps keep them more manageable while transferring them to their new home.
**Step 2: Preparing the Hive**
Ensure that your hive is fully assembled and located in the chosen area. Before placing the bees inside, verify that the frames are properly fitted with wax foundation or starter strips where bees can begin to build comb. This will promote correct hive construction.
**Step 3: Removing the Queen Cage**
Carefully locate and remove the queen cage from the package. Inspect the queen and confirm that she is healthy, active, and free from injury. The queen will usually be inside a small cage with a candy plug. It’s vital to avoid releasing her immediately, as she needs to be integrated into the colony properly.
**Step 4: Introducing the Worker Bees**
Gently shake or pour the worker bees from the package into the newly prepared hive. It’s important to do this calmly and gently. If you were given a package with a perforated can of sugar syrup, remove this and allow the bees to drift out towards their new home. Give them a few minutes to settle before proceeding.
**Step 5: Releasing the Queen**
Once the worker bees are in the hive and have started to orient themselves, it’s time to release the queen. Hang her cage between frames in a central position. The candy plug will slowly be consumed by the worker bees, allowing them to release her over a few days, thus enabling her to be accepted by honeybee colonies.
**Step 6: Closing Up and Feeding**
After ensuring that the queen is safely hung and the worker bees have settled, it’s time to close the hive. Depending on environmental conditions or nectar availability, you may want to add a feeder filled with a 1:1 ratio of sugar to water syrup to support the bees until they can forage effectively.
Ongoing Support for Your Honeybee Colonies
Establishing a hive is the beginning; supporting it effectively requires regular check-ups and careful management.
**1. Regular Inspections**
Conduct thorough inspections of your hive every 7-14 days during the active season. These inspections will help you monitor colony health and dynamics. Look for the following during each check:
- **Queen Health**: Check for signs of egg-laying; a signs of a healthy queen is a frame full of eggs and young brood.
- **Brood Development**: Assess the presence of larvae and pupae, as these indicators show that the queen is indeed contributing to the hive's reproduction.
- **Food Stores**: Survey honey and pollen reserves; colonies should have a steady supply. If supplies run low, be prepared to supplement feed.
- **Disease & Pests**: Look out for signs of pests such as Varroa mites or diseases like Nosema. Identifying these early is crucial for implementing management practices.
**2. Pest and Disease Management**
Fostering a healthy colony involves vigilant monitoring for pests and diseases that can cripple bee populations. Common issues include:
- **Varroa Mites**: These parasites feed on bee blood and can weaken colonies severely. Regularly monitor mite counts using sticky boards or alcohol washes, and consider treatments like miticides during peak seasons.
- **American Foulbrood**: A bacterial disease that affects brood and can spread rapidly. Look for dark, sunken caps on brood cells and foul odors. If you suspect this disease, consult a local beekeeping expert for immediate management strategies.
Implementing Integrated Pest Management (IPM) strategies can help you address these issues with minimal impact on the bees.
**3. Adequate Nutrition**
Your bees will require proper nutrition to thrive. Besides providing sugar syrup immediately after installation, keep an eye on their foraging patterns. If you notice that they are struggling to find natural sources, continue with supplemental feeding. Pollen patties can also be introduced anytime during the early spring to give them the nutrients they will need.
**4. Swarm Prevention**
Swarming is a natural instinct, and preventing it is essential for maintaining a productive hive. Common signs include:
- A sudden increase in drone population.
- The presence of queen cells—these often appear at the bottom of frames or are capped cells, indicating preparation for swarming.
To mitigate swarming, provide ample space by adding supers in a timely manner and splitting hives when populations get too large.
**5. Winter Preparation**
As seasons change and winter approaches, preparations become critical. Ensure your hives are well-stocked with honey stores, various recommendations suggest a minimum of 60-80 lbs. of honey for survival through winter.
- **Reducing Hive Entrance**: Utilize entrance reducers to prevent drafts and minimize access for potential predators. This helps keep the colony warm and secure.
- **Insulation**: Depending on your climate, consider insulating the hive and ensuring proper ventilation to prevent moisture buildup, which can lead to chilled bees.
**6. Engaging with the Community**
Beekeeping is a community-oriented pursuit. Relationships with local beekeepers can be invaluable, offering you practical insights that you learn only through shared experiences. Joining local beekeeping associations provides networking opportunities, access to workshops, and updated information on best practices and trends.
Installing and supporting honeybee colonies is a multifaceted process that requires dedication and awareness. From the careful installation of your first hive to the ongoing management challenges of sustaining a healthy bee population, each step is crucial for your success as a beekeeper.
By understanding the unique needs of honeybee colonies and being proactive in your management practices, you can cultivate an environment where your bees flourish. In return, they will reward you with honey and contribute positively to the environment, playing their essential role in pollination. Embrace the learning journey and enjoy every moment—happy beekeeping!
FAQs
How do you install a new honeybee colony?
Prepare the hive first, position the queen cage between frames, gently add worker bees into the hive, and provide supplemental feed if necessary.
When is the best time to install package bees?
Spring is typically the best time because forage becomes available and colonies have time to build comb, raise brood, and store food before winter.
Should new honeybee colonies be fed?
Yes. Most package bee colonies benefit from 1:1 sugar syrup during establishment.
How often should new hives be inspected?
Inspect within about one week after installation and then every 7 to 14 days during active growth.
How do you know if a queen is accepted?
A queen is likely accepted when workers are calm around her, she has been released, and eggs or young larvae appear in the brood nest.
What is the biggest threat to new honeybee colonies?
Varroa mites are one of the most serious threats because they weaken bees and spread viruses throughout the colony.