Welcome to Lappe's Bee Supply's blogs section. We are a trusted beekeeping company in the USA. We give relevant insights, seasonal guidance, and professional advice for beekeepers of all experience levels. From hive management and bee wellness to honey production and equipment guides, we have it all that you will require to thrive. Get updated, motivated, and connected with the beekeeping community through regular news from Lappe's Bee Supply.
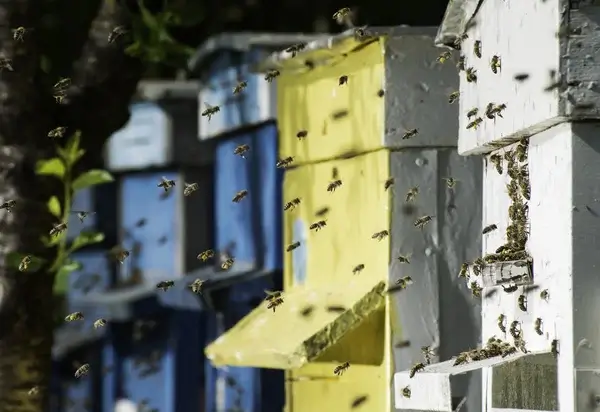
Getting Ready For your New Honey Bees
The Buzz About This Post
- Quick Answer: How Do You Prepare for New Honey Bees?
- Table of Contents
- What Should Be Ready Before Bees Arrive?
- What Should You Do the Week Before Your Bees Arrive?
- How Does Preparation Differ Between Package Bees and Nucleus Colonies?
- Should You Paint a Beehive Before Installing Bees?
- Where Should You Place a New Beehive?
- What Beekeeping Gear Do Beginners Need Before Bees Arrive?
- How Should a New Hive Be Assembled?
- Should New Bees Be Fed After Installation?
- What Are the Most Common Mistakes New Beekeepers Make Before Installing Bees?
- What Happens During the First Week After Bees Are Installed?
- New Honey Bee Preparation Checklist
- Related Beekeeping Guides and Supplies
- Frequently Asked Questions About Preparing for New Honey Bees
- Do I need to paint my hive before bees arrive?
- Can I install bees into an unassembled hive?
- Where is the best place to put a beehive?
- Do new package bees need food?
- Should I feed a nuc colony?
- How soon should I inspect a new colony?
- Can I move my hive after bees are installed?
- Can I keep bees in the shade?
- Do bees need water immediately?
- Can I install bees in cold weather?
- How many frames should be in the hive before installation?
- What if my queen is not released?
- When should I add a second deep brood box?
- Sources and Further Reading
- Final Takeaway
- FAQs
Getting Ready for Your New Honey Bees: A Beginner’s Complete Preparation Guide
Before your honey bees arrive, your hive should already be painted or protected, assembled, placed in its permanent location, and stocked with the tools and feed needed for installation.
New colonies do best when installation day is calm, organized, and fast. This guide explains exactly what to prepare before package bees or a nucleus colony arrives, including hive location, equipment, feeding, setup order, and beginner mistakes to avoid.
Written by Lappe’s Bee Supply. Lappe’s Bee Supply is a family-owned beekeeping supplier based in East Peru, Iowa, helping beginner and experienced beekeepers prepare, equip, and manage healthy honey bee colonies.
Preparing your hive before installation day helps new honey bee colonies establish faster and reduces stress during their first week.
Quick Answer: How Do You Prepare for New Honey Bees?
To prepare for new honey bees, set up the hive before installation day, choose a sunny and sheltered location, gather protective gear and hive tools, prepare a feeder, and have sugar syrup ready if supplemental feeding is needed. A prepared hive lets the colony begin drawing comb, raising brood, and organizing food stores immediately.
Lappe’s Bee Supply field note: In many spring installations, strong first-year colonies need a second deep brood box within 3 to 4 weeks when weather, feeding, and forage conditions are favorable. Having extra equipment ready prevents colonies from becoming crowded during early buildup.
Table of Contents
- Quick Answer: How Do You Prepare for New Honey Bees?
- What Should Be Ready Before Bees Arrive?
- What Should You Do the Week Before Your Bees Arrive?
- How Does Preparation Differ Between Package Bees and Nucleus Colonies?
- Should You Paint a Beehive Before Installing Bees?
- Where Should You Place a New Beehive?
- What Beekeeping Gear Do Beginners Need Before Bees Arrive?
- How Should a New Hive Be Assembled?
- Should New Bees Be Fed After Installation?
- What Are the Most Common Mistakes New Beekeepers Make Before Installing Bees?
- What Happens During the First Week After Bees Are Installed?
- New Honey Bee Preparation Checklist
- Related Beekeeping Guides and Supplies
- Frequently Asked Questions About Preparing for New Honey Bees
- Do I need to paint my hive before bees arrive?
- Can I install bees into an unassembled hive?
- Where is the best place to put a beehive?
- Do new package bees need food?
- Should I feed a nuc colony?
- How soon should I inspect a new colony?
- Can I move my hive after bees are installed?
- Can I keep bees in the shade?
- Do bees need water immediately?
- Can I install bees in cold weather?
- How many frames should be in the hive before installation?
- What if my queen is not released?
- When should I add a second deep brood box?
- Sources and Further Reading
- Final Takeaway
What Should Be Ready Before Bees Arrive?
A new bee colony should arrive to a fully prepared hive. The hive should be painted or otherwise protected, placed in its final location, assembled with frames, and ready with an entrance reducer and feeder.
Beekeeping becomes much easier when the setup work is finished before the bees arrive. Installation day is not the time to search for missing tools, assemble hive boxes, mix feed, or decide where the hive should go. Bees are living livestock, and they benefit from a calm, prepared installation.
At minimum, a beginner beekeeper should have these items ready:
- Hive stand or stable base
- Bottom board
- Hive body or brood box
- Frames and foundation
- Inner cover
- Outer cover
- Entrance reducer
- Feeder
- Bee suit, veil, or jacket
- Gloves
- Smoker and fuel
- Hive tool
- Sugar syrup, if feeding is needed
Beginner tip: Lay out every tool before opening the bee package or nuc box. Once the bees are open, you want to work smoothly instead of stopping to find equipment.
What Should You Do the Week Before Your Bees Arrive?
The week before bees arrive should be used for final preparation, not major decisions. Your hive location, equipment, feeder, protective clothing, and installation plan should all be ready before pickup or delivery day.
| Timing | Preparation Task | Why It Matters |
|---|---|---|
| 7 Days Before | Finish painting or protecting hive equipment | Gives paint or finish time to dry and air out before bees arrive |
| 5 Days Before | Place hive stand and assemble the hive | Confirms the hive is level, stable, and complete |
| 3 Days Before | Check protective gear, smoker, hive tool, feeder, and entrance reducer | Prevents last-minute equipment problems on installation day |
| 1 Day Before | Prepare syrup if feeding and verify weather conditions | Helps installation move quickly and calmly |
| Installation Day | Install bees gently, add feed if needed, and reduce disruption | Allows the colony to begin organizing in its new hive |
How Does Preparation Differ Between Package Bees and Nucleus Colonies?
Package bees need more preparation for feeding and comb building, while nucleus colonies need careful frame transfer and space management. Both should be installed into a complete hive, but their first-week needs are different.
| Preparation Point | Package Bees | Nucleus Colony |
|---|---|---|
| Comb | Usually start with no drawn comb | Arrive with several drawn frames |
| Feeding | Often need syrup to support comb building | May need syrup depending on stores, weather, and nectar flow |
| Queen | Queen may arrive in a cage and needs release management | Queen is usually already laying in the nuc |
| Installation Focus | Gentle release, queen acceptance, feeding, and warmth | Careful frame order, brood placement, and space management |
| Early Growth | Growth starts after comb and brood nest are established | Can expand quickly because brood is already present |
Should You Paint a Beehive Before Installing Bees?
Yes. Paint or protect wooden hive equipment before bees are installed. Once bees occupy the hive, painting becomes disruptive and impractical. Paint only the outside surfaces and allow the finish to cure completely before installation.
Painting a hive protects exposed wood from rain, snow, sunlight, and moisture. Exterior protection helps hive bodies, covers, and other wooden parts last longer in the bee yard. Many beekeepers use light-colored exterior paint because lighter colors reflect sunlight and can help reduce heat buildup during warm weather.
Only the outside of the hive should be painted. The interior surfaces should remain unpainted so bees can interact naturally with the wood, wax, and propolis inside the colony.
| Hive Painting Step | Best Practice | Why It Matters |
|---|---|---|
| Paint timing | Paint before bees arrive | Prevents disturbing an occupied colony |
| Paint type | Use exterior-grade, water-based paint | Protects wood while avoiding harsh interior exposure |
| Paint location | Paint exterior surfaces only | Keeps the inside of the hive natural for bees |
| Color choice | Use white or light colors in hot climates | Reflects sunlight and helps reduce overheating |
| Cure time | Let paint dry and air out fully | Reduces odor before bees are installed |
Lappe’s Bee Supply field note: Wax-dipped equipment can last about 8 years longer before needing touch-up compared with painted equipment because the wax penetrates the wood rather than simply coating the outside surface.
Where Should You Place a New Beehive?
The best place for a new beehive is a level, accessible site with morning sun, wind protection, good drainage, nearby water, and low human traffic. Choose the location before bees arrive because moving a hive later can disrupt bee orientation.
Hive location affects colony comfort, beekeeper access, and day-to-day management. A hive does not need a perfect site, but it does need a practical one. The best location is easy for you to inspect and safe for the bees to defend and navigate.
Morning Sun
Morning sunlight warms the hive earlier in the day and can encourage bees to begin flying sooner. A hive that receives morning sun and some afternoon relief is often easier to manage than one placed in deep shade.
Wind Protection
Strong wind can make it harder for bees to regulate the hive environment. Fences, shrubs, trees, sheds, and natural land features can all serve as windbreaks.
Good Drainage
A hive should not sit in a low, soggy area. Moisture is hard on woodenware and can make colony conditions less stable. Use a hive stand or solid base to keep equipment off the ground.
Easy Access
You should be able to stand comfortably behind or beside the hive during inspections. Leave enough room to remove covers, lift boxes, set down tools, and work safely.
Nearby Water
Honey bees use water for cooling, humidity control, and feeding developing brood. A shallow water source with landing surfaces can help keep bees from visiting swimming pools, pet bowls, or neighbors’ water features.
| Location Factor | Recommended Setup |
|---|---|
| Sunlight | Morning sun with some afternoon protection in hot areas |
| Wind | Use natural or built windbreaks |
| Ground | Level, dry, and stable |
| Access | Enough room for inspections and lifting boxes |
| Water | Provide a reliable shallow source with landing spots |
| Traffic | Avoid sidewalks, play areas, and busy entrances |
What Beekeeping Gear Do Beginners Need Before Bees Arrive?
Beginners should have protective clothing, gloves, a smoker, smoker fuel, a hive tool, a feeder, and basic installation supplies ready before bees arrive. The goal is to work safely, calmly, and efficiently during installation and early inspections.
Protective gear builds confidence. Bees respond better to calm, deliberate movement, and beginners are more likely to move calmly when they feel protected. At minimum, use a beekeeping veil or jacket that protects your face and neck.
| Equipment | Purpose | Beginner Note |
|---|---|---|
| Bee suit, jacket, or veil | Protects face, head, and upper body | Face protection is essential for confidence and safety |
| Gloves | Protects hands during installation and inspections | Choose gloves that allow enough dexterity to handle frames |
| Smoker | Helps calm bees during inspections | Practice lighting it before installation day |
| Smoker fuel | Creates cool smoke | Use clean, dry fuel that smolders well |
| Hive tool | Pry boxes and frames apart | One of the most-used tools in beekeeping |
| Feeder | Provides supplemental syrup | Especially useful for new packages drawing comb |
| Entrance reducer | Reduces the hive entrance | Helps small colonies defend the entrance |
| Nail or push pin | Used with some queen cage release methods | Keep small installation tools nearby |
Protective clothing and beginner tools are available through Lappe’s Bee Supply beekeeping protective clothing and bee suits.
How Should a New Hive Be Assembled?
A new hive should be assembled from the ground up: stand, bottom board, brood box with frames, feeder if used, inner cover, and outer cover. The hive should be level, stable, and complete before bees are installed.
Hive assembly is simple, but order matters. Each part supports airflow, weather protection, colony space, or beekeeper access.
Standard Hive Assembly Order
- Hive stand: Keeps the hive off the ground and improves airflow.
- Bottom board: Forms the floor of the hive.
- Debris tray or screen, if used: Helps with monitoring and ventilation.
- Brood box or hive body: Holds frames where bees build comb, raise brood, and store food.
- Frames and foundation: Provide the structure for comb building.
- Feeder, if used: Supplies syrup to support early growth.
- Inner cover: Helps with spacing, insulation, and ventilation.
- Outer cover: Protects the hive from rain, snow, and sun.
Avoid this beginner mistake: Do not install bees into a hive that is missing frames. Empty space causes bees to build comb in places that make inspections difficult.
Should New Bees Be Fed After Installation?
New bee colonies often benefit from supplemental feeding, especially package bees that must draw new comb. Feed sugar syrup when natural nectar is limited or when the colony needs support building comb and brood nest structure.
Package bees start with no drawn comb, no stored food, and a queen that needs to become established. Feeding can help them begin building quickly. Nucleus colonies often arrive with frames of brood, bees, and food, but they may still need feeding depending on weather, nectar flow, and colony strength.
Use clean equipment and avoid spilling syrup around the hive, as spilled syrup can attract ants, robbing bees, and pests.
| Colony Type | Feeding Need | Why |
|---|---|---|
| Package bees | Often recommended | They need energy to draw comb and establish brood |
| Nucleus colony | Depends on conditions | They may already have brood and food frames |
| Strong nectar flow | May reduce need | Natural forage can support colony growth |
| Cold or rainy weather | Often helpful | Bees may be unable to forage consistently |
What Are the Most Common Mistakes New Beekeepers Make Before Installing Bees?
The most common beginner mistakes are installing bees into incomplete equipment, forgetting feed, choosing a poor hive location, and inspecting too aggressively during the first week. Most problems are preventable with preparation.
| Mistake | Why It Causes Problems | Better Approach |
|---|---|---|
| Installing bees before the hive is fully assembled | Creates stress and can lead to misplaced comb | Assemble the complete hive before pickup or delivery |
| Forgetting a feeder | Package bees may struggle to draw comb without support | Have a feeder clean, ready, and installed if needed |
| Painting too late | Fresh paint odor and wet surfaces are not ideal for installation | Paint at least several days before bees arrive |
| Choosing a high-traffic location | Increases bee-human conflict | Place hives away from sidewalks, doors, and play areas |
| Leaving out frames | Bees may build comb in unwanted open spaces | Install the correct number of frames before adding bees |
| Opening the hive too often | Disrupts queen acceptance and early organization | Give the colony time to settle before repeated inspections |
What Happens During the First Week After Bees Are Installed?
During the first week, new bees focus on queen acceptance, comb building, brood nest setup, feeding, and orientation flights. The beekeeper’s job is to support the colony without over-disrupting it.
| Time After Installation | Colony Activity | Beekeeper Task |
|---|---|---|
| Day 1 | Bees begin organizing around the queen and hive space | Install gently and provide feed if needed |
| Days 2–3 | Bees orient to the hive entrance and begin settling | Observe from outside without unnecessary opening |
| Days 4–7 | Comb building and queen release or laying progress should begin | Check queen release if using a package bee queen cage |
| Weeks 2–4 | Brood nest expands and population begins building | Monitor feed, space, and early colony strength |
Lappe’s Bee Supply field note: Many first-year spring colonies can expand quickly after installation. Keep extra deep equipment available so you can add space when the bees are covering most frames and need room to continue building.
New Honey Bee Preparation Checklist
Use this checklist before installation day. If every item is complete, you are ready to receive your bees.
Hive Preparation
- ☐ Hive boxes are painted, wax-dipped, or otherwise protected
- ☐ Paint or finish has fully cured
- ☐ Frames and foundation are installed
- ☐ Hive is fully assembled
- ☐ Entrance reducer is ready
Location Preparation
- ☐ Hive site receives morning sun
- ☐ Site is level and well-drained
- ☐ Hive is protected from strong wind
- ☐ Beekeeper has room to work
- ☐ Water source is available nearby
Gear Preparation
- ☐ Veil, jacket, or bee suit is ready
- ☐ Gloves are ready
- ☐ Smoker is ready
- ☐ Smoker fuel is dry and available
- ☐ Hive tool is available
- ☐ Feeder is clean and ready
Installation Preparation
- ☐ Sugar syrup is prepared if feeding is needed
- ☐ Queen cage release method is understood
- ☐ Weather has been checked
- ☐ Installation plan is reviewed before opening bees
Related Beekeeping Guides and Supplies
Frequently Asked Questions About Preparing for New Honey Bees
Do I need to paint my hive before bees arrive?
Yes. Paint or protect the outside of wooden hive equipment before bees arrive. Do not paint the inside of the hive.
Can I install bees into an unassembled hive?
No. The hive should be fully assembled before installation. Bees should not be installed into loose, incomplete, or missing equipment.
Where is the best place to put a beehive?
The best hive location has morning sun, wind protection, dry ground, nearby water, and enough space for the beekeeper to inspect the colony safely.
Do new package bees need food?
Package bees often benefit from sugar syrup because they must draw comb and establish the brood nest from scratch.
Should I feed a nuc colony?
A nuc may need feeding if it has limited stored food, poor weather prevents foraging, or nectar flow is weak. If the nuc has strong food stores and forage is abundant, feeding may be less necessary.
How soon should I inspect a new colony?
Many beekeepers perform the first inspection about one week after installation to confirm queen release, comb building, brood progress, and early colony strength.
Can I move my hive after bees are installed?
It is best to place the hive in its final location before installation. Moving a hive after bees are oriented can confuse returning foragers.
Can I keep bees in the shade?
Bees can live in partial shade, but deep shade may keep hives cooler and damper. Morning sun is usually preferred because it helps bees become active earlier in the day.
Do bees need water immediately?
Yes. Honey bees use water for cooling, humidity control, and brood care. A shallow water source with landing spots should be available before bees arrive.
Can I install bees in cold weather?
Cold, windy, or rainy weather can make installation harder. If conditions are poor, keep bees protected and follow pickup or supplier instructions until installation conditions improve.
How many frames should be in the hive before installation?
The hive body should contain the correct number of frames for that box size. Do not leave open gaps, because bees may build comb in the wrong spaces.
What if my queen is not released?
If the queen is still in her cage after the expected release period, inspect carefully and follow the recommended release method for your package or supplier instructions.
When should I add a second deep brood box?
Add a second deep when the colony is strong enough and using most of the frames in the first box. In favorable spring conditions, many first-year colonies may need this space within 3 to 4 weeks.
Sources and Further Reading
- Lappe’s Bee Supply: Beekeeping Protective Clothing and Bee Suits
- Lappe’s Bee Supply: Beekeeping Supplies
- Lappe’s Bee Supply: Honey Bee Feeders
- USDA: Pollinators
- Penn State Extension: Beekeeping
- University of Minnesota Extension: Beekeeping Basics
Final Takeaway
The best way to prepare for new honey bees is to finish the hive before the bees arrive. A protected hive, smart location, complete equipment setup, ready feeder, and calm installation plan give your colony the best start possible. When the bees arrive, your job should be simple: install them gently, feed when needed, and let the colony begin building its new home.
FAQs
Do I need to paint my hive before bees arrive?
Yes. Paint or protect the outside of wooden hive equipment before bees arrive. Do not paint the inside of the hive.
Can I install bees into an unassembled hive?
No. The hive should be fully assembled before installation. Bees should not be installed into loose, incomplete, or missing equipment.
Where is the best place to put a beehive?
The best hive location has morning sun, wind protection, dry ground, nearby water, and enough space for the beekeeper to inspect the colony safely.
Do new package bees need food?
Package bees often benefit from sugar syrup because they must draw comb and establish the brood nest from scratch.
How soon should I inspect a new colony?
Many beekeepers perform the first inspection about one week after installation to confirm queen release and early colony progress.
Can I move my hive after bees are installed?
It is best to place the hive in its final location before installation. Moving a hive after bees are oriented can confuse returning foragers.